Feeds:
Posts
Comments

My family and I made a trip to see relatives last fall.  While we were there, one of my cousins made a stuffing squash casserole that my husband and I found to be very good.  After getting home, we tried to replicate it.  Here is what we came up with…

Ingredients:

3 C Stuffing – Corn bread works great
1/3 C melted butter
1 can Cream of Chicken Soup
½ C Sour Cream
1 small Yellow Squash – cubed
3 small Zucchini – cubed
1 small Onion – finely diced
1/3 C Shredded Carrot
¾ C Shredded Cheddar Cheese

Directions:

Preheat oven to 350°.  Mix the stuffing and melted butter in a medium bowl.  Spread 2 ½ cups of the stuffing mixture into the bottom of a greased 9 x 13 glass pan.  Mix the soup, sour cream, squash, zucchini, onion, carrot, and ½ cup of the cheese together in a large bowl.  Spoon the mixture over the stuffing – spread carefully!  Place the remaining stuffing mixture over top and sprinkle with cheese.  Bake for 45 minutes!  Enjoy!!!

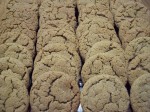
For a very long time, I shied away from these wonderful cookies for fear of them not ending up soft and chewy like all of the wonderful ones that I remembered eating.  That and really, who wants to measure molasses.  It’s sticky and messy!  But, I found a hit in a cooking magazine once that said to spray the measuring cup 1st.  I thought why not…and guess what!  It works!!!  Now I use this little trick for measuring honey, molasses, corn syrup…pretty much anything sticky!!!

Ingredients:

3/4 C  Butter – softened

1 C  Sugar

1 Egg

1/4 C  Molasses

2 C  Flour

2 tsp Baking Soda

1/4 tsp Salt

2 tsp Ground Cinnamon

1/2 tsp Ground Cloves

1/2 tsp Ground Ginger

additional sugar for rolling cookies in

Directions:

Blend butter, sugar and egg until smooth.  Stir in the molasses. Add the flour, baking soda, salt, cinnamon, cloves and ginger and stir well.

Cover the dough and allow to chill in the refrigerator 1/2 to 1 hour.

Preheat oven to 375°.  Roll the cookie dough into small balls (I like use a small cookie scoop.)  Then roll the balls in the additional sugar.  Place on ungreased cookie sheets, about 2 inches apart.

Bake 8 – 10 minutes or until tops are cracked slightly.  Allow to cool 1 minute on cookie sheet, then remove to cooling racks!

Enjoy!!!

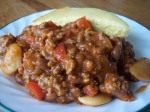
What part of this meal would any man not love?  A true meal in itself!  The corn bread adds the finishing touch and makes this super hearty after a long day out in the cold!  Best of all…it cooks at the same time in the oven and at most should take 30 – 45 minutes to prepare and bake…that includes the chopping and browning of the meat!

I am currently working on an anniversary present for my brother-in-law and his wife.  This recipe is sure to make the “book”.  Thanks to my sister, I have recently stumbled on a great company based out of Wisconsin called Bare Books.  I am using one of the company’s books to create a cookbook of sorts as a gift to them.  It will include many of my family’s favorite recipes that are kid friendly, adult loved and super easy to make!!!  Have you ever given the gift of recipes?

Hearty Beef and Bean Casserole

1 lb ground beef
1 medium onion – chopped
½ large red pepper – chopped
1 Tbsp brown sugar
1 tsp chopped garlic
1 tsp freshly ground black pepper
¾ C water
½ tsp soy sauce
16 oz can bushes baked beans
15 oz can butter beans
6 oz can tomato paste

Preheat oven to 400°.  In a large skillet, brown the beef, onion and red pepper.  Drain off the fat.  Add the remaining ingredients and stir well.  Pour into a greased 2 quart casserole dish.  You will bake both items at the same time…see below!

Corn Bread

1 ¼ C flour
¾ C Corn Meal
¼ C sugar
2 tsp baking powder
1 C milk
¼ C apple sauce
1 egg beaten

Combine the dry ingredients.  Stir in the milk, apple sauce and egg.  Pour batter into a greased 8 or 9” pan (a pie plate works just fine).  Put the casserole and the corn bread both in pre-heated oven for 20 – 25 minutes or until the bread is a light golden brown and toothpick inserted in the center comes out clean.

Pasta of your choice – I used a box of Fusilli pasta
3 boneless skinless chicken breast – sliced thin
2 Tbsp olive oil
4 slices prosciutto – diced
1Tbsp minced garlic
1/2 cup chicken broth
2 cups prepared pasta sauce
1 cup heavy cream
salt & pepper to taste
1 cup Parmesan cheese – shredded

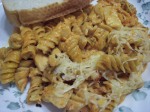
Begin by boiling the water to cook the pasta in. Once that comes to a boil, cook the pasta. While the pasta is cooking, heat oil in skillet to medium high. Add chicken breast. Cook the chicken breast in skillet till cooked through. Add prosciutto and garlic. Saute 3 – 5 minutes being careful not to burn the garlic. Deglaze the pan with chicken broth and simmer 3 – 5 minutes to reduce. Add pasta sauce, heavy cream, salt and pepper. Simmer just about a minute to blend the flavors. Drain pasta. Stir into sauce. Transfer to greased baking dish. Top with Parmesan cheese. Bake in 375 oven until cheese is melted and bubbly! Enjoy!!!

This is the last of the apple posts…at least for a little while!  Apple Butter soon to come…but I have a few things planned first!

This stew is super simple to make, and has a slightly sweet flavor that compliments the beef nicely!

100_8966

Ingredients:

1 lb Sirloin tip roast cut into bite sized pieces
1 Tbsp extra virgin olive oil
1 Tbsp flour
3 Cups water
4 beef bouillon cubes
3 Cups Apple Cider
½ lb carrots – peeled and chopped
3 large potatoes – cleaned (peeling is optional) and chopped
1 med onion – chopped
1 tsp basil
¼ tsp thyme
½ tsp garlic powder
½ tsp fresh ground black pepper
Pinch of sea salt

Directions:

In large pot, brown beef in oil and flour just until all sides are browned.  Add remaining ingredients and simmer until veggies are fork tender and beef is cooked through.  I have a gas stove, so this only takes about a half hour on simmer, but an electric stove will take longer.

I found a great recipe for mini cheesecakes on bakerlla.com.  While they look great as they are, I just had to make them my own!

100_8965

Follow the link above for the original recipe which is for mini cherry cheesecakes.  I’ve listed below what I did!

Ingredients:

2 pkg. (8oz.) cream cheese, softened to room temperature

3/4 cup sugar

3 eggs

1 Tbsp vanilla

1 Tbsp lemon juice

2 tsp ground cinnamon

48 mini nilla wafers

48 1.25″  diameter baking cups (the mini ones from Wilton)

1 can apple pie filling chopped

Directions:

Preheat oven to 350°.  In a large bowl, beat cream cheese until well blended.  Add sugar, eggs, vanilla, and lemon juice.  Blend well.  Add ground cinnamon to the batter and work just until blended.

Line mini muffin tin with liners.  Drop one mini Nilla wafer into each liner.  Fill with cheesecake batter (note, I used the Pampered Chef small cookie scoop to fill mine and it worked awesome!)  Note most mini muffin tins have 24 cups in them, so you will need to bake twice!  Bake for 20 minutes.  Allow to cool 15 – 20 minutes before removing from pan.  Refrigerate at least 4 hours.  Top with apple pie filling and a sprinkle of additional cinnamon!  Enjoy!

I attempted to make apple bread last week one day!  I have failed.  And failed terribly!  I don’t recall ever a time when I have baked something that did not get eaten in my house!  This was it!  In fact, we threw more than 1/2 of it out!

I refuse to give up!  I want to find a recipe to try again!  Anyone?  Please?  Have a recipe that you love for apple bread?  I need to bake again!  I need to succeed at this!

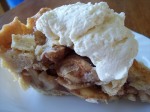
Apple Pie!!!

100_8573

Ok…so I usually don’t bake my pie’s with a crust from scratch.  Frankly, why bother!  The store bought, already rolled out crust are fairly good, and super easy to use, not to mention actually very inexpensive when you start to look at all the ingredients in a crust.  But, I recently purchased a huge bag of pastry flour and just had to give this a try!  I found the recipe for the crust online, but honestly can’t remember where as I printed it out after pasting it into MS Word many months ago.  I have however rewritten the instructions to make them easier to follow!  The filling, that is something that I’ve just done forever!  Think I have my mom to thank for that one!

Crust:

2 1/2 cups pastry flour, plus extra for rolling out the crust

1 cup butter, cut into 1/2″ cubes and well chilled

1 tsp salt

1 tsp sugar

4 – 6 Tbsp ice water

Directions:

Start by cubing the butter.  Stick into freezer and allow to remain there at least 15 minutes.

In food processor, combine flour, salt and sugar.  Pulse to mix.  Add the very well chilled butter pieces and pulse until mixture is crumbly and you can see pea size pieces of butter.  Begin to add the ice water 1 Tbsp at a time, pulsing the mixture slightly to incorporate.  Add only enough water to bring the dough together (hint, it should still be crumbly, but if pinched, will hold together nicely.)  You may not need all 6 Tbsp of water, or you may need slightly more.

Remove dough from food processor until a clean and dry surface.  Shape into 2 disks, kneading just enough to bring the dough together.  (Remember, those small bits of butter will be your friend!  Do not knead them into the dough!!!)  Wrap in plastic wrap and chill 1/2 hour.

Remove dough from refrigerator and place on lightly floured surface.  Roll out with a rolling pin to a 12″ circle with the dough about 1/8″ thick.  Place in pie plate.

Filling:

6 large apples

1 C sugar

3 Tbsp cinnamon (note, I love cinnamon..you may want to tone this down)

1/3 C flour

1 Tbsp butter, very thinly sliced

OK…now is the time to begin to preheat your oven.  400°.  Peel, core, and thinly slice apples.  Toss with sugar, cinnamon, and flour.  Pour into prepared bottom crust.  Top with thin slices of butter.  Roll out remaining crust, place onto of filling and seal the edges of the 2 crust together.  You will need to slit so ventilation!

Beat 1 egg white in small bowl and brush over the top of the crust.  Bake pie 45 minutes to 1 hour, until apples are cooked through and crust is golden brown.

We topped our pie with fresh whipped cream!  There really is no better topping!!!!
Do you bake pies?  From scratch or do you use pre-made crust?


Wealthy Apples

I realized that I didn’t share what apples we were trying.  The variety is Wealthy.  The orchard that we bought them at classifies them as a cooking apple, but I have to say, we have enjoyed a couple already just as they are!  They make a great eating apple in my opinion.  They are a little tart, but very crisp and I love the white flesh inside!

It’s apple season!!!!  I am so excited!  I have several apple recipes lined up to make/try this week!  I went to a local orchard and purchased a peck (that’s 10 ish pounds) of a new variety of apples that we haven’t tried before.  Did I also mention the apple cider we picked up?  Yes, fresh apple cider right from the source!!!  I love the fall!!!!

With young children in the house, I have been more interested in how things are grown then I ever used to be.  For instance, I chose the orchard we visited based on the fact that they use Integrated Pest Management opposed to traditional spraying of the whole orchard!  Finding out that it is becoming more and more common as we as consumers push for safer food production.

So, now that I’m home with all these apples, sit back and prepare yourself for a few ways to use all these apples!!!

100_8569

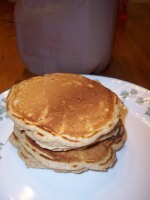
Apple Cinnamon Pancakes – You could add smoke Applewood Smoked bacon, or sausage and make this a lunch or even a quick weeknight dinner!

Ingredients:

2 Cups all-purpose flour

2 Tbsp sugar

2 Tbsp ground cinnamon

4 tsp baking powder

1/2 tsp salt

2 eggs

1 1/2 C milk

1/2 cup butter flavored Crisco – melted

1 large apple, peeled, cored, and finely chopped.

Directions:

In glass measuring cup, melt Crisco in the microwave in 30 second increments until melted.  Set aside.

In large bowl, mix flour, sugar, cinnamon, baking powder, and salt.  Set aside.

In another bowl, mix milk and eggs.  Beat slightly.

Combine milk and egg mixture with dry ingredients.  Mix until moistened.  Add melted Crisco.  Stir just until blended.  Fold in finely chopped apples.  Pour onto hot griddle using a 1/4 cup measuring cup.  Pancakes should be flipped when bubbles appear on top.  Flip once, and allow the other side to get golden brown.  Repeat with remaining batter.  Serve with syrup, or butter and sprinkle with cinnamon and sugar.

Allow leftovers to cool on cooling rack.  When cooled completely, wrap in plastic wrap and store in refrigerator.  Reheat in oven or microwave.